Blog Feed

Welcome to Heavenly Kitchen

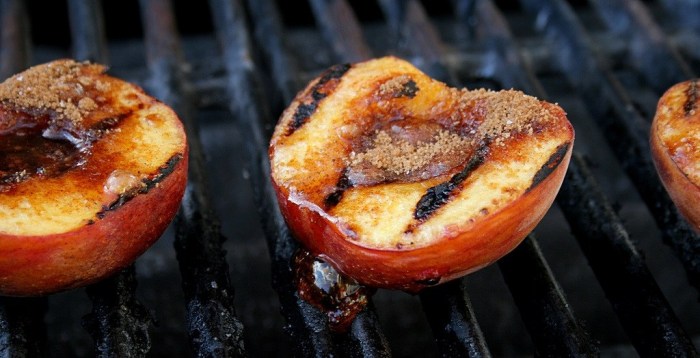
Life is too short to skip dessert.

Hi there! Welcome to Heavenly Kitchen, where all your sweetest dreams come to life. My name is Angela a 21-year-oldfrom New Hampshire. Being from the granite state, I love the outdoors but my love for baking overcompensates for that. If you asked me five years ago, I might’ve told you that I see myself working in a restaurant but now I more see myself more as a baker. The summer between high school and college I made the discovery that my love for baking exceeded my love for the savory side of the kitchen. The more I thought about this epiphany the more I thought of my childhood. As a kid, a majority of the time that I was in the kitchen was to help with pastries and desserts. Maybe it was because when we were done, my mom would let my sister and I lick the remaining batter. But it was also because I loved seeing the end result. A majority of people I’ve talked to since my journey began always say that they love to bake but they either never have time or don’t want to deal with the mess in the end. Here, my mission is to help relieve half of that stress through shortcuts by creating simple yet crowd-pleasing desserts everyone will love. Get you aprons on, preheat those ovens and lets get baking.

Chocolate Chip Muffins

These are the best chocolate chip muffins ever; or at least the muffin base is. this muffin recipe has everything you would want a muffin to taste like. The texture and moisture ratio of the muffin resulted with a beautiful crumb. And of course my favorite part is the muffin top. the top of the muffin had an amazing crunch. And of course you don’t have to make chocolate chip muffins. You an always switch out the chips for blueberry, cranberry, strawberry or any other item you would like. Give it try and let me know what you think!

Blueberry Chocolate Chip Muffins

Makes 1 Dozen

Ingredients-

1 ¼ C. + 2 tsp.  All- Purpose Flour

¾ tsp. Baking Powder

1C. + 1 Tbsp. +1tsp Granulated Sugar

¼ C. +1 Tbsp. Butter, Soft

1 ½ tsp. Salt

1 Egg

3 Tbsp. Buttermilk

1 Tbsp. Vanilla Extract

¼ C + 1 Tbsp. + 1 tsp. Vegetable Oil

¼ C. + 1 Tbsp. Choco. Chips

1 Tbsp. Coarse Salt

Procedure-

  1. Coat the Muffin tin with a light film of fat or use appropriate paper liners.
  2. Sift together the flour and baking powder.
  3. Cream together the sugar, butter, and salt with the paddle attachment on medium speed, scraping down the bowl periodically, until the mixture is smooth and light in color, about 5 minutes.
  4. Whisk together the eggs, buttermilk, vanilla, and oil. Add to the butter- sugar mixture in two or three additions, mixing after each addition until fully incorporated and scraping down the bowl as needed.
  5. Add the sifted dry ingredients and mix on low speed until evenly moistened. Fold I the Blueberries and Chocolate Chips.
  6. With a large cookie scoop. Scoop batter in prepared muffin tin, filling it ¾ full.
  7. Gently tap the filled tin to release any air bubbles. Sprinkle with coarse sugar.
  8. Bake at 375°F until a skewer inserted near the center of a muffin comes out clean, about 30 minutes.
  9. Cool the muffins in the tin for a few minutes, then transfer to a rack to cool completely.

Three- Berry Cobbler

What perfect way to celebrate summer with a cobbler made with some fresh fruit. This cobber recipe that I have is the perfect summer dessert. Starting with the perfect crust that holds well to the sauce that can be the perfect amount of thickness. Before I mix any of my ingredients to taste a few of the fruits to see if they may be tarty. If so just add a bit more sugar when mixing the fruit up. If you find that the sauce isn’t thick enough add a little bit of flour. Everyone has their own preference when it comes to eating fresh fruit and how sweet they like it. And this is the perfect example of a recipe where you can play around with and still not mess it up.

3-2-1 Pie Dough

Makes 3 lbs

Ingredients-

1 ½ lb. All- Purpose Flour

½ oz. Salt

1 lb. Butter, Cut into pieces, Chilled

8 oz. Cold Water

Procedure-

  1. Combine the flour and salt in the mixer. Add the butter and blend with the paddle attachment on medium speed until pea- size nuggets form, about 3 minutes. For flaky dough, you are looking for ½ to ¾ in pieces of butter. For Mealy dough you are looking for almost a coarse cornmeal consistency. Add the water all at once ad continue to mix until the dough just comes together.
  2. Turn out the dough onto a lightly floured work surface, Scale the dough as desired. Wrap tightly and refrigerate for at least 1 hour before rolling.

Three- Berry Cobbler

Makes 10 Cobblers
Ingredients-

1 ½ C. Strawberries, hulled and Halved

1 ¼ C. + 1 Tbsp. Raspberries

1 ½ C. Blueberries

½ C. Sugar

1 Tbsp. Cornstarch

11 oz. 3-2-1 Pie Dough

As Needed Egg Wash

Procedure-

  1. Combine all the berries in a bowl and toss with the sugar and cornstarch.
  2. Divide the mixture evenly among 10 ramekins.
  3. Roll out the pie dough ¼ in. thick. Cut into 10 rounds big enough to cover the ramekins, approximately 4 in. in diameter.
  4. Top the filled ramekins with the pie dough rounds. Lightly brush with egg wash.
  5. Bake at 325°F until the tops are golden brown, about 20 minutes.
  6. Serve warm.

Chocolate Chip Scones

These Chocolate Chip Scones are to die for. These scones have the perfect balance of moist to dry texture and not all that crumbly. This would be a snack that pairs perfectly with tea or coffee. With an amazing crunchy on the outside and a soft and flaky inside will have anyone running for seconds. If you want to opt out on the chocolate chips and do a different flavor; that is perfectly fine. You can always switch the chips out with blueberries or maybe a lemon cranberry scone with a lemon glaze. For the Lemon Cranberries; change the chips with the dried fruit and add a little bit of lemon zest. And you will be the next big talk at your next brunch!

Chocolate Chip Scones

Makes 20 Scones

Ingredients-

1 ¼ C. + 2 tsp. Pastry Flour

1 tsp. Salt

1 tsp. Baking Powder

 1 Tbsp. Sugar

¾ C. Butter, Cold, Cubed

1 Egg

1 Egg Yolk

¾ C. + 3 Tbsp. Heavy Cream

¾ C. Chocolate Chips

As Needed Egg Wash

Procedure-

  1. Line a sheet pan with parchment paper.
  2. Sift together the flour, salt, baking powder, and sugar.
  3. Ass the butter to the dry ingredients. Mix on low speed with the paddle attachment to incorporate.
  4. Combine the eggs, yolks, and heavy cream.
  5. Add the egg mixture to the sifted dry ingredients and butter all at once. Mix to incorporate, then mix in the chocolate chips. Do not over Mix.
  6. Place the Dough on the prepared sheet pan, and apt or roll until it is approximately 1 in. thick. Cover and chill in the refrigerator until firm, at least 1 hour.
  7. Cut the dough into the desired shape, brush with egg wash, let rest for 5 minutes, and brush with egg wash again.
  8. Bake at 400°F until golden row, 15 to 18 minutes.
  9. Cool the scones on the sheet pan for a few minutes, then transfer them to racks to cool completely.

5 Tips I Learned from Writing a Blog

We’ve all been there before, where you start a hobby before you know if you’re great at it or not. For some, these hobbies come natural and for others, not so much. Baking is one of those hobbies and carriers that you can distinctively know if you were born with this talent or not. But the one thing bakers will always forget when they start a blog is if a beginner will be able to reconstruct the same dessert. Below are some tips to get beginners and experts onto the kitchen at the same level.

  1. Never Underestimate Simplicity

As much as everyone loves going above and beyond, sometimes you got to go back to the basics. For me, I love going back to a basic vanilla cupcake recipe and playing with the ingredients. Whether I’m looking for a cupcake with more moisture or one with a bit more crumb to it. Going back and reconnecting with the basics is going to help flow in new ideas whether by creating new recipes or connecting with your readers.

2. Don’t Go Overboard on Presentation

So you created that photograph worthy dessert. To every other baker, that’s easy. But you don’t want to be posting intimidating photos of your finished product when you know that not everyone is at the same skill set. Always assume that your readers don’t know anything about baking and give them that simple rustic look. Then if you have any of those above and beyond photo’s that you know professional bakers will love put those in later. Or create an evergreen list from all you simple desserts about how your professional readers can advance the baking skills.  

3. Skill Sets

You love to brag about how you went to the top culinary school in America and you want to share all those baking secrets. Ok, that’s fine, but remember, you’re not sharing these with other professional bakers but also with those who would like to learn as well. You have to assume everyone is one the same skill set. Not everyone will know what sifting is or the folding technique. Put in structural videos in or tips on how to become better at baking.

4. Ingredients

Not everyone will know the difference between baking soda and baking powder. Or the difference with all the different types of flours that are on grocery shelves. And that extracts are only flavoring ingredients. Change your blog up once and a while and make an evergreen. Give your readers new and different content each week. You want your readers to learn something from your blog. Just like I wrote for tip #1, simple discussions can always be the most educational post. Just because you know about that topic doesn’t mean everyone else does. 

5. Know your readers

After writing in your blog for a while and reading comments from your readers, you will get a sense of what type of readers you have. My favorite part is getting to know some of the readers and getting opinions from them; especially if their bloggers as well. From knowing who is reading your blog you can start to play around more and open up new categories. From those who are beginners to the experts. Then you will have an understanding of how to write and how to get on their level of understanding.

National Cheesecake Day!

Next week, July 30th is National Cheesecake Day! What a great way to celebrate one of my favorite desserts with you. The one thing that makes a cheesecake, a cheesecake, is that they are dense and heavy. But the recipe that I am sharing with you is light and not as filling. I made this for 4th of July and everyone went back for seconds.

I topped my cheesecake with fresh raspberries but of course, you can top with any fruit you’d like or with nothing at all. For those who are gluten-free; simply switch the graham crackers for gluten-free graham crackers. This alternative will not change the cheesecake and you can’t even tell that’s it’s a gluten-free crust. Another occurrence that many bakers find is their cheesecake may crack. If this happens, it’s the perfect reason to put fruit on top.

The best way to prevent you cheesecake from cracking is letting it cool down in the oven. During the summer once the cheesecake seems to be about done I’ll shut my oven off and leave the cake in there about 30-45 min. For the last 15 minutes, ill open the oven door but leave the cake in the oven still, and then I’ll take it out and let rest on a wire rack. For Winter I usually leave the cake in the oven for about an hour with the oven door closed. 15 minutes before the hour is up I’ll check the temperature of the oven, and if it seems to be nearing room temperature ill open the door and leave the cake in the oven. I won’t take the cake out until the oven comes back down to normal temperature. From their you’ll have the perfect, delicious cheesecake!

Do you have any tips on making the perfect cheesecake? Share them by leaving a comment!

Cheesecake

Ingredients

  • 12 graham crackers, crushed
  • ½ cup butter, melted
  • 24 oz. cream cheese, at room temperature
  • ¼ cup sugar
  • 4 eggs, beaten
  • 1 tablespoon vanilla extract
  • mixed berries, to serve

Preparation

  1. Preheat oven to 350ºF (180ºC).
  2. In a bowl, add the crushed graham crackers and melted butter and stir to combine.
  3. Place the graham cracker mixture in a greased 8-inch (20-cm) springform pan, spreading them in an even layer. Bake for 20 minutes or until it turns slightly golden on the top.
  4. In a bowl, mix the cream cheese and sugar using a hand mixer until smooth.
  5. Add the eggs and vanilla, and continue beating until all ingredients are fully incorporated.
  6. Add the cream cheese mixture to the top of the graham cracker crust.
  7. Bake for 1 hour, or until it looks semi-jiggly in the center and set on the edges.
  8. Refrigerate for 12 hours, or overnight.

5 Reasons to Love Family Owned Restaurants

 Maybe this time you’ll stop at the small diner you passed on the way to work today. Maybe you and your friends will try that restaurant that’s been in town for the last 50 years. Maybe you want to eat somewhere, where you feel like home.

Family Restaurants are those places. These are the places where you either come for a quick bite or stay for an hour or two. They also are the ones that will know the best places to go for tourist and the places to stay away from. They’re the type of people that know everyone in their community to help those within the community. These are the places I love and the reasons why I love Family Owned restaurants.

  1. Cultural Heritage

Family restaurants know how to bring out the heritage within the business. Because they’re not only sharing their food and recipes but also sharing their family traditions and holidays. I love going to new restaurants with different cultural backgrounds. What’s so amazing about learning these different backgrounds is knowing about how the importance of food reflects their culture and learning what is sacred to them.

2. Atmosphere

Coming off from the cultural heritage, the atmosphere is what’s going to keep customers coming back. The atmosphere of two different cultures is, of course, going to have two different atmospheres and it depends where you want to go and what type of food you would want to try.

3. Locals

As a traveler, you can get a sense of the town or city when you go to a family restaurant. Plus you get real honest answers to see as a tourist. I love connecting with the locals and listening to the backstory of their time within the town I’m in. They also will know the best routes to take to get to your destination and within that route can be the most beautiful sceneries.

4. Kid-friendly

A family restaurant wouldn’t be its name if it wasn’t kid-friendly, but that’s also the greatest part also. You don’t have to go to some 5-star restaurant to get the best quality. Sometimes you got to go to those small diners that will not only be kid-friendly but also the most generous service you’ll most likely ever get. These are also the restaurants that will have crayons and activity papers for the kids with the menu on it for them. Plus these restaurants know how picky kids can get and can always change certain ingredients out for something else.

5. You get what you paid for

When you go to a new restaurant I hope that I get want I pay for, especially if it’s a breakfast place. For starters, I know that diners will fill your plate up to the point where you have to ask for a to-go container. That’s the main idea of those family restaurants; they really want to make you feel at home and feed you like family.


4 Desserts You Can Make with Fresh Peaches

Every year after the Fourth of July supermarkets start selling incredibly ripen peaches. All you have to do is walk by the fruit and you can smell the fragrance from this summertime fruit. Below I’m sharing some of my favorite recipes with you all.

  1. Peach Cobbler

You can’t write a list without peach cobbler. Peach cobbler is fruit cooked in its own syrup with dropped biscuit batter on top. Allrecipes.com has a great recipe for those who like to make everything from the peach mixture to the biscuit batter. For those who like 3 step recipes that are more of a set a timer and forget about it check out this peach cobbler from Tasty. This isn’t your classic peach cobbler but its taste like one. This recipe is made in a slow cooker that only takes 2- 2 ½ hours to cook and a prep time of about 5 minutes. Easy Peasy!

  • Peach Crisp

A common mistake when it comes to desserts is same may say that a cobbler and a crisp is the same when there are not. As mention above a cobbler has a dropped biscuit dough on top whereas crisp has a flour oatmeal mixture that covers the whole top of the dish. This is such a fun and easy dish. Here you can find a simple recipe that I use as an outline. This can also be a Gluten-Friendly dish by swapping out flours for gluten-free flour. The topping taste will still be just as delicious as if you were using regular flour.

  • Peach Pie

To me, every season is pie season. Nothing is better than eating a hot pie that came right out of the oven with a delicious scoop of vanilla ice cream. But then again who wants to be hacking away at making the perfect pie crust to go with that delightful filling you made. Well here is an easy simple fix; in the freezer section of any grocery store, you can buy pie crust that’s ready to use. All you have to do is roll one of the doughs out and fit into your pie dish. Put your filling on top and finish by putting the second pie dough on top. And if you don’t have a peach pie filling recipe, here you can find a recipe outline that will give you a flavorful pie. Whether you want to use can or fresh peaches.

  • Grilled Peaches

Who said that grilling was only great for chicken and meats? In my opinion, anything that’s grilled that not meat is a bonus. Not everyone knows the amazing taste that comes from grilled peaches and I’m hoping this because you’re favorite. Tasty has a great recipe for grilled peaches that comes with its own caramel pecan sauce. Everything in this recipe is used, which to me is another great idea that I love. It’s the perfect dessert to end a great BBQ cookout. One common mistake is that everyone comments that the pecans get burnt. Remember to heat your pan up first before adding any ingredients in, by then your caramel will cook just as long as your pecans before anything burns.  

10 Basic Baking Ingredients You Need in Your Pantry

  1. Flour

Most of the time the only flour you’ll really need is All-Purpose Flour; also known as AP Flour. There is a bunch of other flour out their like pastry, bread, and cake flour to name a few. You can also make certain flours is you have the right ingredients.

2. Sugar

The top three sugar you need is white, brown and confectioner (Powder) sugar. A majority of the time you will only be using white and brown sugar. Confectioner sugar is mostly saved as a garnish to sift on top but you also use this for buttercream frosting.

3. Salt

Using salt in your baked good don’t only enhance the flavor but also help enhance other flavors you may not notice. When you add salt in bread, it helps control the fermentation rate of yeast.

4. Vanilla Extract

I love adding vanilla extract to everything that needs flavor and mostly that’s what vanilla extract is used in; everything. All your flavor comes from extracts their only there for the flavoring factor.

5. Baking Powder

Baking powder is a leavening agent used in baked goods. This will help rise your baked good as well keep its structure.

6. Baking Soda

Baking soda is the reaction to the wet ingredients. The air bubbles created by the reaction helps the baking powder to give the baked good its height.

7. Oil

Using Oil helps with texture and moisture. If you feel as if a cake or muffins were too dry, look at what you use for oil. Sometimes you either use the wrong type or not enough.

8. Chocolate Chips

In my house, I always have chocolate chips on standby. Whether you got to make a dessert for an event or just want chocolate chip cookies. You can add these in cakes, cupcakes, muffins, bread, and cheesecake.

9. Parchment Paper

When I first started to learn to bake in high school that’s when I found out about the wonders of parchment paper. I use to spray my pans with vegetable oil, but I found when that when I did these the sides of my cake would feel weird. Whereas parchment paper I can get the picture perfect phot without the look of oil on the side of my cake.

10. Cupcake Liners

Just like parchment paper, cupcake liners are used the same way. I like to use this two different way; either by lining a muffin pan or when I do large batches I’ll set them up on a cookie sheet.

10 Must Need Baking Gadgets you need to Survive

So you have your recipe and ingredients, but do you have the right gadgets. Below is the 10 must need gadgets to survive any baking project.

  1. Electric Mixer

Whether you go with and stand or handheld mixer; electric mixer will not only improve the speed of preparation but also give you the results you want.

2. Measuring Cups

A set of liquid and dry measuring cups are essential when baking. Baking is a science and you will know if you added too much or too little of an ingredient

3. Measuring Spoons

As mentioned previously; just like measuring cups, measuring spoons are a must. Baking is about having the right amount of ingredients and one thing can throw it all off.

4. Measuring Scale

When I bake I love using a scale to measure out my ingredients. Using a scale lets you measure your items more precisely than with dry measuring cups.

5. 3 piece bowl set

Having at least 3 different size bowls in your house makes baking more enjoyable and less messy. Also if you ever need to make a small batch of cookies to a large batch of cookies you have the correct bowl size to use.

6. 6 Piece Bakeware Set

Cookie Sheet9x13 Rectangular Cake Pan12 Cup Muffin pan 9” Round Cake Pan9” Loaf PanWire Cooling Rack

7. Spatula’s

From a rubber spatula to an offset spatula, these are the only Spatula’s you need. The Rubber Spatula will help you scrape the bowl clean of any batter you have from the bowl to the pan. The offset spatula will help you from scraping off excess flour from your measuring cup to frosting cakes and cupcakes.

8. Crockpot/ Instant Pot

Ever volunteer for something last minute that needs a dessert. A crockpot or instant pot is at your service. All you really have to do is add your ingredients into the pot, mix or layer and cook on high for about 2 hours and done.

9. Handheld Grater

A handheld grater gives you that above and beyond garnish. You can use this to grate chocolate, lemon Coconut or even Cinnamon.

10. Storage Containers

And Lastly, Storage Containers, you either have too much or not enough of these. But either way, they are perfect for storing leftover dessert or using them at the Christmas cookie swap. Storage Containers are always a must.